Today’s blog shares a quick photography tip on how I achieve sharp focus on E-Commerce items.
There are a lot of ways to create visual interest in an image. Bold colors, leading lines, the rule of thirds, the list goes on. In Product Photography, one of the most important things that we do to draw the eye where we want it in the image is to create crisp focus on the product.
One of the most important camera settings to consider when creating imagery is aperture. In other words, how wide the shutter opens with each image capture. The wider you open the shutter, the more “blur” (also known as “bokeh”) you will have in your image. You’ve likely seen bokeh as a technique used in modern family and wedding photography because it makes the subject “pop” off of the background.
Take this image of my kiddos and their sweet cousin, for example. The subjects are in focus and the background is not. Using a wider aperture (f/2.8) creates this effect.

In product photography, we use those wide apertures, too, in order to draw the eye where we want it to go in the image. But sometimes, we need the whole object to be in sharp focus. When the object stands upright in one focal plane, we can achieve this by “stopping down” or using a more narrow aperture to widen the focal plane. Less light is allowed through the lens and the image becomes under exposed. Sure, we could increase the sensitivity of the lens to increase the exposure in-camera, but that creates more grain (“noise”) in the images and is not the type of image that you are investing in.
So what do we do when an object lays horizontally or is wider than the focal plane?
Sometimes it is important for all parts of an object to be in sharp focus. Stopping down the aperture is only part of the solution. In product photography it can be very important that all parts of an object are in sharp focus in order for the consumer to be able to fully see the product. I achieve this focus by using a technique called Focus Stacking.
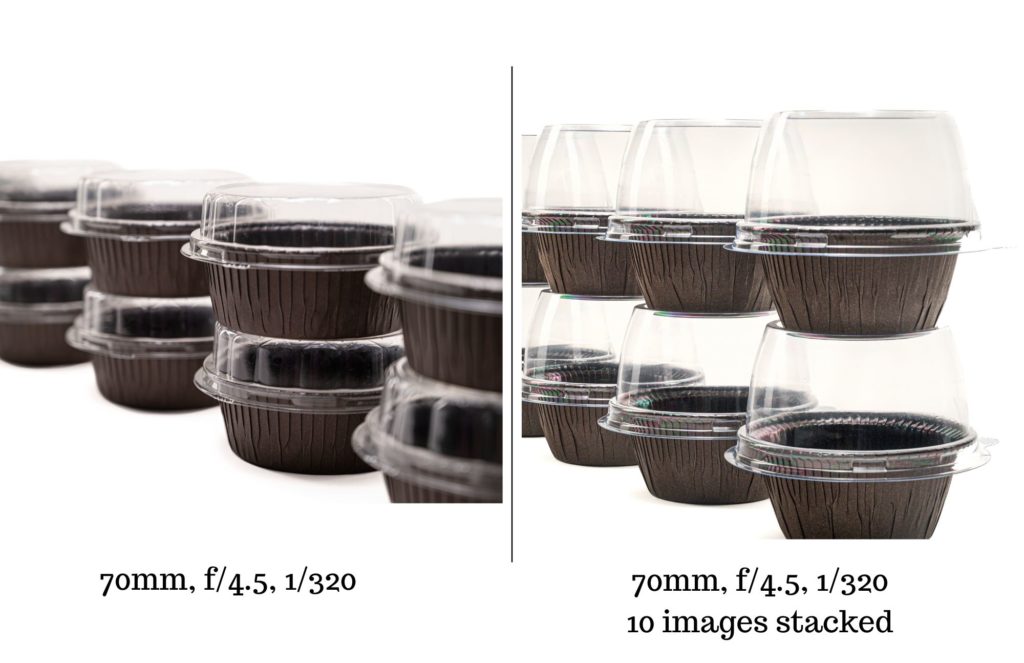
With Focus Stacking, the photographer focuses on different parts of the object/scene in a series of multiple images. Computer programs “stack” those images together and create a final image consisting of only the in-focus parts of each image.
In this second example (shot for Novacart USA), you can see the difference in style between the two images. This is called Selective Focus. The image on the left focuses on one stack of products in a line to draw the eye to that specific item. The image on the right employs focus stacking so that all of the products in the line are in clean, crisp focus.

Shooting Tethered
When I am shooting products in-studio, I always tether my camera to my laptop. I view the images on my monitor immediately after they are taken to determine if my vision was achieved. There are several programs on the market that allow a photographer to create Focus Stacked images. I use a program called Smart Shooter 4. I select how many images I want to take, how far apart each focal plane will be and whether I want the line of focus to move forward or backward. Once I have captured my images, I switch to a different program called HeliconFocus. HeliconFocus stacks and interprets the data, rendering a final image that is fully in focus. Then, I use Adobe Lightroom and Photoshop to make final edits on the images.
Bada-Bing-Bada-Boom, you’ve got yourself an image that is in tack sharp focus!
0 COMMENTS